How Does Invisalign Work?
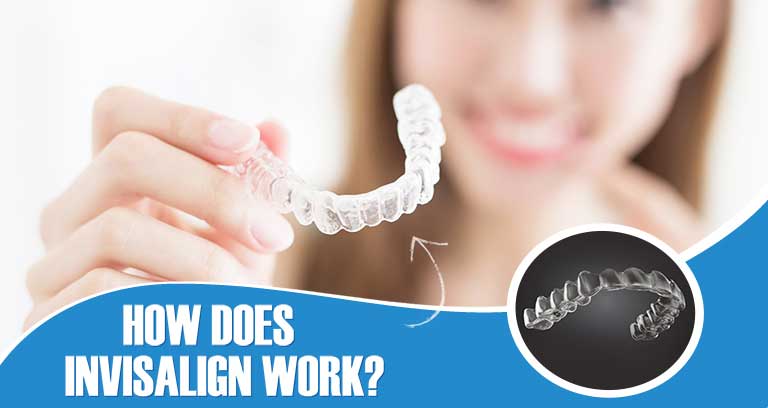
At first glance, Invisalign trays may just look like a small piece of plastic… But the truth is, there’s been over 5 million patients treated with Invisalign and about 20 years of research that went into perfecting this little piece of plastic.
It has never worked better or been any easier to improve your smile.
Can Clear Aligners Really Move Your Teeth?
Invisalign treatment can be broken down into 4 simple steps:
Your Invisalign specialist creates a digital image of your teeth.
Your Invisalign specialist designs a customized solution to fixing your teeth and bite.
Your Invisalign aligners are fabricated and delivered to the orthodontist’s practice.
You continue treatment at home with periodic visits to the office.
Each new set of aligners applies controlled force to different parts of your teeth, gradually shifting them into the desired position.
Now, there is obviously more that goes into each step then that. But the Invisalign process is fairly straightforward.
For those who want to get into the specifics, read below to get the details of each step:
Step 1: Creating a 3D digital image of your teeth
The Invisalign process begins with an initial consultation where the dentist examines your oral health, takes X-rays, digital scans, and discusses the Invisalign process and likely cost with you.
To capture a 3-dimensional image of your teeth, your Invisalign doctor has two options:
Option 1
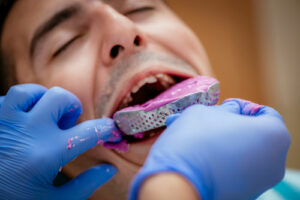
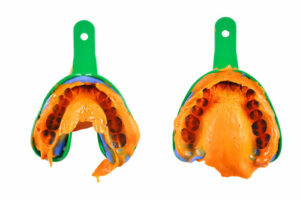
The doctor can take a mold or impression of the patient’s teeth and send this impression to the Invisalign company, who then scans that impression to create a highly-detailed 3D model.
This is the old way of doing it (and the least comfortable) but you may still find some doctors doing it this way. While there is nothing technically wrong with taking impressions, most orthodontists will find that most patients don’t like the experience…
…and it will cause some patients to gag.
In-office impressions are also prone to more inaccuracies than newer forms of 3D scanning. The impression of the teeth can get distorted as they are “snail-mailed” to the Invisalign company. (Which means your trays won’t fit as well, and your teeth may not move as accurately)
Option 2
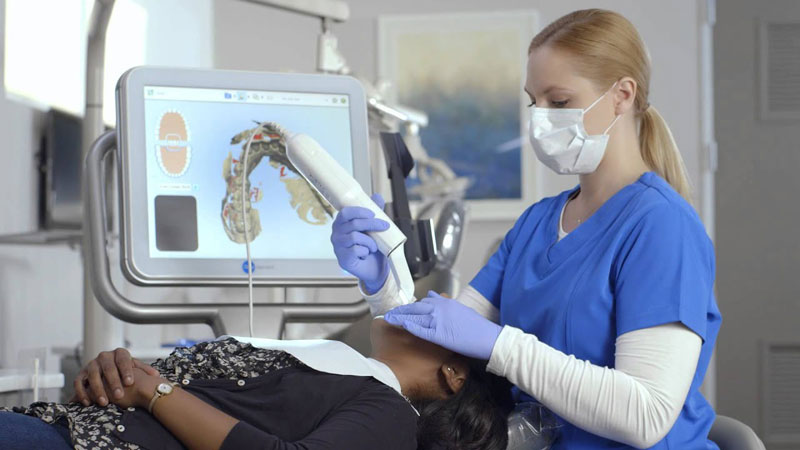
The other (and more preferred option) is the doctor takes a 3D scan in the office, and then instantly submits to the Invisalign company.
This is the preferred method by patients and doctors alike, as it is completely painless, comfortable, and more accurate.
Because the scan is submitted instantly, it will usually shave off 2 – 4 weeks from your treatment time as well.
If a doctor uses the first method, it is not necessarily a reflection on their abilities—It could be could be a matter of resources and technological capabilities.
Nevertheless, it is best to take you or your child’s tolerance for discomfort, as well as your desired timeline for starting Invisalign, into account when proceeding with either method.
Step 2: Your Doctor Creates a Customized Treatment Plan For Your Treatment
Once the 3D image is uploaded into the Invisalign system, your doctor will work with an Invisalign lab technician to customize a specific plan to straighten your teeth.
Generally, your doctor will create a plan that moves your teeth gradually with multiple aligners. You will wear your first aligner for about a week and then another.
You will continue to switch out aligners until your teeth have fully moved into a straight position.
The number of aligners needed is dependent on each patient’s teeth and the doctors’ customized treatment plan. This goes back to the importance of starting with a personalized plan from the start.
The customization of your Invisalign treatment plan is really the most important part of the process.
Why’s that?
If your Invisalign treatment plan isn’t set up right from the start, there’s a good chance your results won’t be that great. This means you’re treatment time will take much longer and the results won’t be as good as promised.
Even though technology has advanced, there really is no replacement for the experience, expertise, care and artistry of the skilled orthodontist.
Just like you could hire the neighbor’s kid to paint a room in your house (who you just know will miss spots and get paint on furniture)…
…if you really want the job done right, you’ll go with an experienced, professional painter—even if it costs you more.
It may surprise you to hear this, but the customization phase is actually a more important step than the actual installation of Invisalign.
Like anything, a shaky foundation will bring everything built above it crumbling down. It really is crucial that you have an experienced Invisalign doctor you trust to complete this step.
Step 3: Your Aligners are Delivered and Your Treatment Begins.
It usually takes about 4 weeks after your dental scan until your Invisalign braces treatment officially begins (if you’re doing the old impression method it will likely take 8 weeks).
This 4 week period gives enough time for:
The doctor to customize your Invisalign treatment plan
The Invisalign aligners to be manufactured
The shipment of your aligners to arrive at your orthodontist’s office
At your first visit after the arrival of your aligners, your doctor may place “Invisalign attachments.”
These are small tooth-colored attachments that are placed on the teeth to help act as a “handle” and allow the Invisalign trays to move the teeth more accurately:
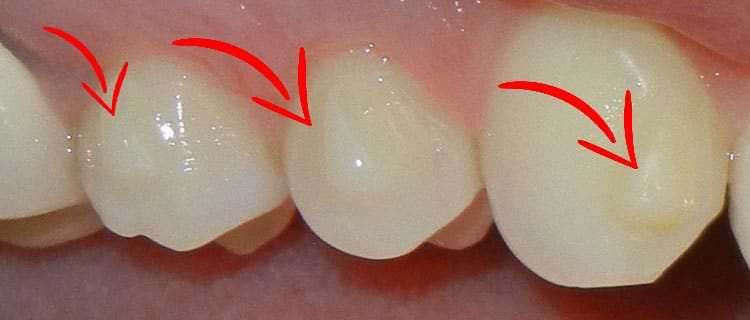
The necessity, size, and location of these attachments is determined by your doctor while they are customizing your Invisalign treatment plan.
In addition to attachments, your doctor may recommend:
Reshaping of certain tooth surfaces
The wearing of rubber bands to help correct your bite
Additional appliances or modifications to help in your treatment
Just like each person is different, no two Invisalign treatment plans will be the same.
Once your attachments are in place, the doctor or one of the orthodontic technicians will try in your Invisalign aligners, provide instructions on how to care for them, and answer any questions you may have.
The good news is, this first visit where you receive your attachments is usually your one and only “long visit” of the entire process. (It generally takes about 30 minutes)
Once the attachments are placed, all future visits will generally be very short and not too frequent. (Usually 10 minutes or less!)
Step 4: You Continue Your Invisalign Treatment at Home With Periodic Office Visits
Usually at your first visit you will be given a series of aligners. You will be asked to wear your aligners full-time, taking them out during meals and while cleaning your teeth. This at-home continuation of the teeth straightening process ensures that your treatment progresses smoothly.
Each aligner is worn for about 1 week, and then you will change to the next aligner, and then the next. Each aligner moves your teeth into a new position. Because your teeth are moving so gradually and the forces are so light, there is rarely any discomfort.
You may not notice any big changes during the first couple of weeks, but within a month or two you will notice changes and see dramatic improvements to your smile!
Some of the big benefits of Invisalign are:
You can eat anything you want! No dietary restrictions or avoiding your favorite foods like when wearing braces.
It is very easy to maintain your oral hygiene. You can brush and floss like normal and it doesn’t interfere with your normal routine.
They are practically invisible (hence the Invisa-lign). Most people won’t even know that you’re straightening your teeth! This is especially comforting news for your child, who will not have to worry about getting awkward looks or getting made fun of by schoolmates.
They are SO much more comfortable than braces. No poking wires, irritated cheeks, emergency visits, or any of the other things most hate about braces.
Most doctors see their Invisalign patients every 8 – 12 weeks to check in and monitor the treatment’s effectiveness. The doctor may prescribe adjustments or modifications as needed based on how your teeth are progressing.
If you try going with treatment on your own, (like with a mail-order aligner company) there is no guarantee that your teeth are progressing correctly as time goes on.
As you can see, Invisalign isn’t “in a box, off a shelf” – and shouldn’t be treated like a Happy Meal. It’s a 100% customized system made for each patient with the orthodontist’s customized treatment plan.
The orthodontist designs the end results and the day-by-day process to ensure a perfect smile and a healthy bite.
Now that you understand how Invisalign works, let’s discuss what type of tooth and bite problems can most easily be fixed with Invisalign.
Read Chapter 2 to find out if Invisalign can fix your bite!
Schedule a Free Invisalign Consultation For You or Your Child
You can schedule a 100% free consultation for Invisalign you or your child with Premier Orthodontics to find out if Invisalign is the best choice for you.
An initial exam and Invisalign consultation is 95% about getting your major questions and concerns answered directly from a professional, like:
![]() And any other questions you may have.
And any other questions you may have.


