By Dr. Tyler Coles – Premier Orthodontics
If you’ve ever had braces, or if you are in orthodontic treatment right now, then there’s a chance that your orthodontist has asked you to wear rubber bands while in orthodontic treatment. Rubber bands with braces may seem difficult at first, but with a few tips and tricks from this article, you’ll know how to put rubber bands on braces, by yourself, in no time.
What Are Rubber Bands For Braces?
Orthodontic rubber bands, also known as elastics, are small elastic bands that hook onto your braces from the top teeth down to the bottom teeth.
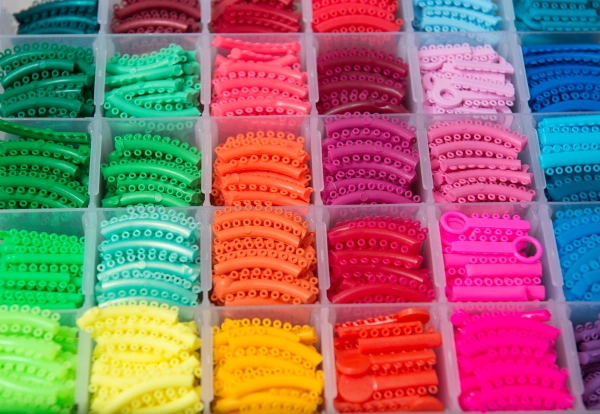
Do note that orthodontic elastic bands are different from the small colored ties (also known as o-ties or ligatures) put on braces to hold the archwire in place.
Orthodontic rubber bands look similar to rubber bands that you might see at a local office supply store—but they are designed specifically for delivery of the proper force levels to your teeth. In other words, your average rubber band should not be used for braces.
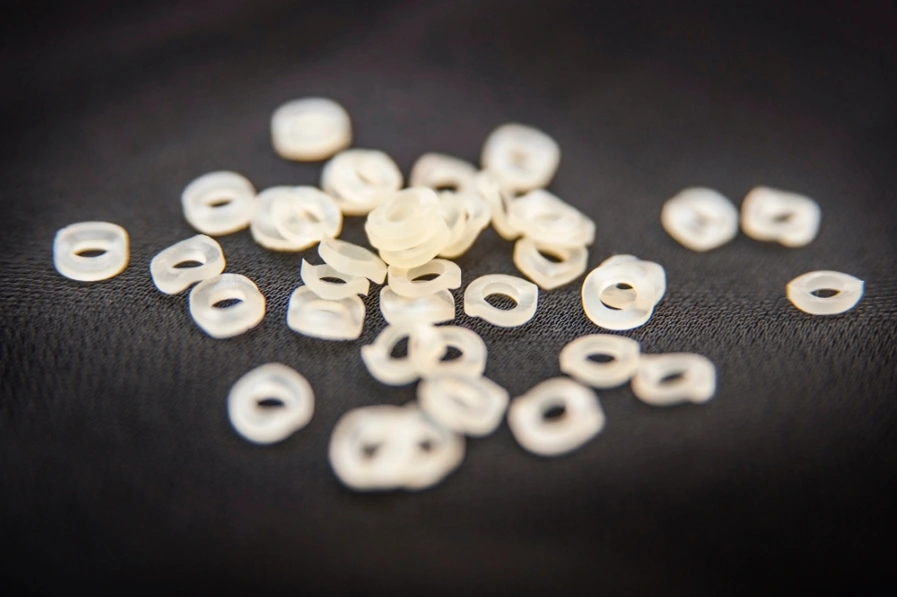
Orthodontic rubber bands are usually made of latex, but they also come in latex-free synthetic bands for those with sensitivities.
Why is Wearing Rubber Bands For Braces Needed?
Your braces by themselves do a great job of straightening your teeth and closing spaces. But there are certain bite problems that can’t be fixed with braces alone. This is where orthodontic rubber bands come in.
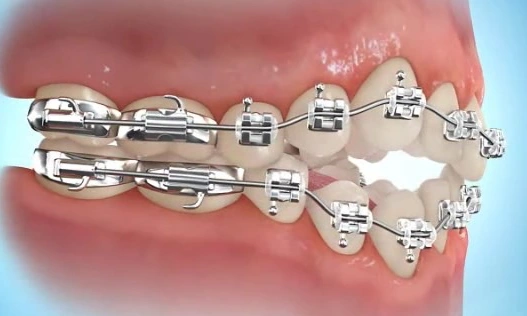
Fixing Overbites With Rubber Bands
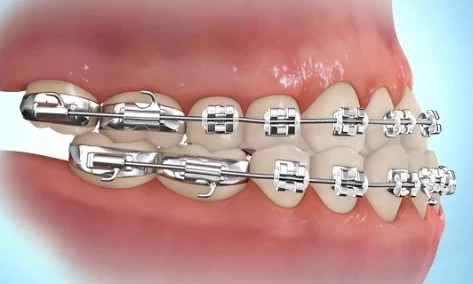
One type of bite problem that requires rubber bands is an overbite (the upper teeth stick out too far).
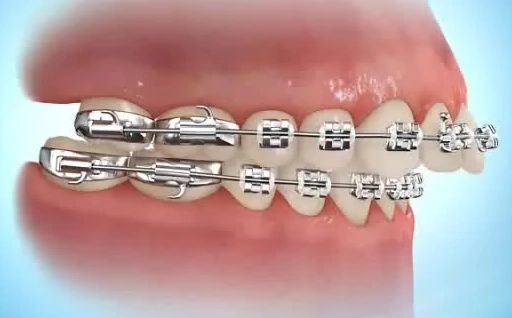
For someone who has an overbite, they would wear elastic rubber bands that hook to a bottom tooth near the back of the mouth and stretch the elastic towards a front tooth on the top arch. (See the images below for a visual of what these look like)
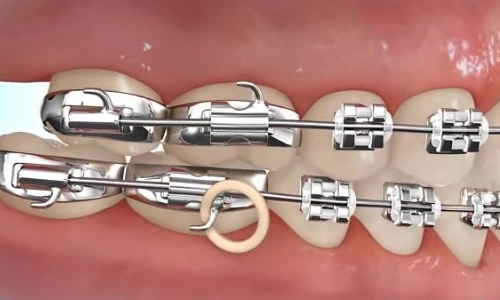
Applying the rubber bands in this pattern helps to pull the top teeth back and the lower teeth forward, improving your bite.
Watch the video below to see how an orthodontic treatment with rubber bands can fix an overbite.
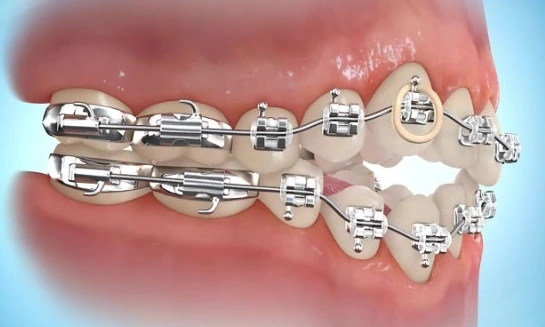
Fixing Underbites With Rubber Bands
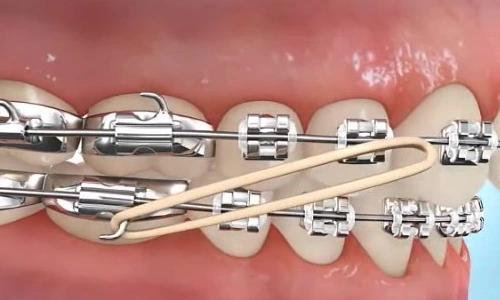
Another type of bite problem that requires rubber bands is an underbite (the lower teeth stick out too far).
For someone who has an underbite, they would wear rubber bands that hook to the top teeth near the back of the mouth and stretch the elastic band towards the front teeth on the lower jaw. (See the images below for a visual of what these look like)
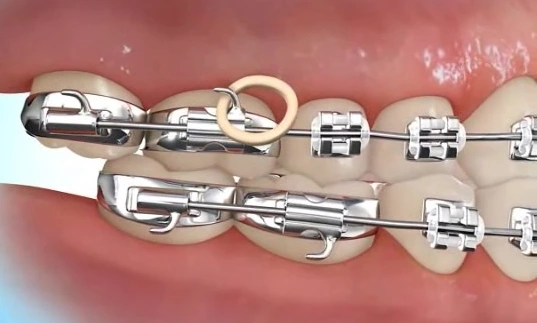

Applying the rubber bands in this pattern helps the rubber bands pull the top teeth forward and the bottom teeth back.
Watch the video below to see how orthodontic rubber bands can fix an underbite.
Fixing Open Bites With Elastic Bands
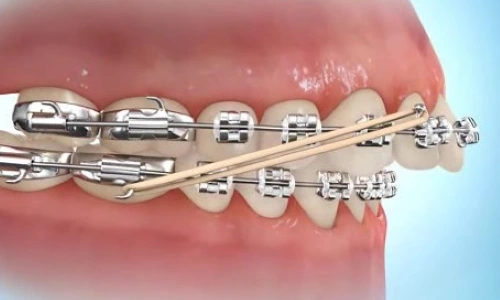
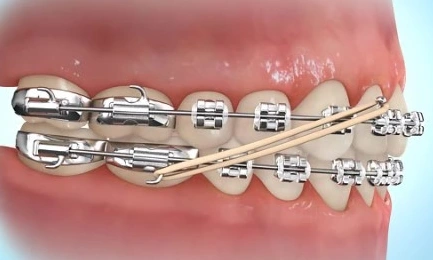
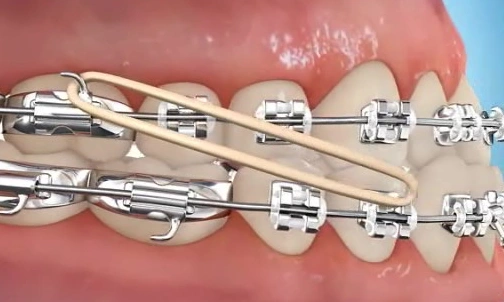
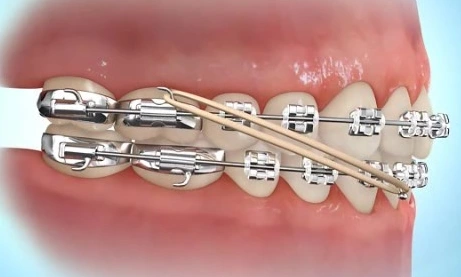
Another type of bite problem that requires rubber bands is an open bite (the top teeth on the upper jaw don’t touch the bottom teeth on the lower jaw) Open bites can happen on the front side or back of the mouth.
For someone who has an open bite, they would wear rubber bands that hook to the top teeth and stretch the elastics towards the bottom teeth, usually directly beneath. Usually, the rubber band is pulled down in a triangle pattern. (See the images below for a visual of what these look like)
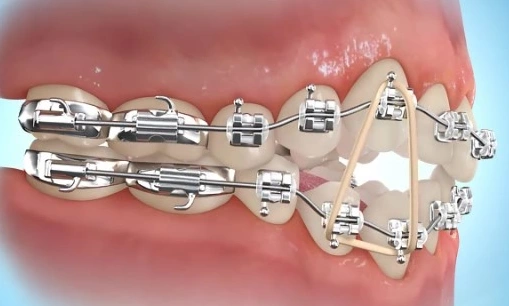
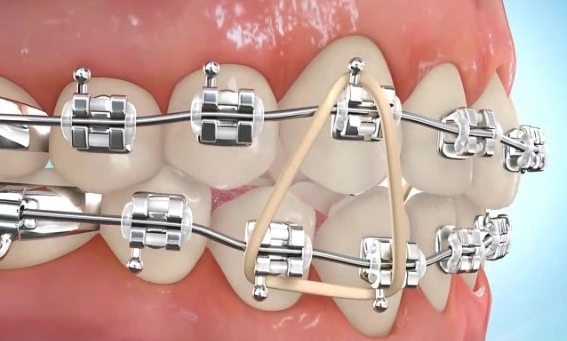
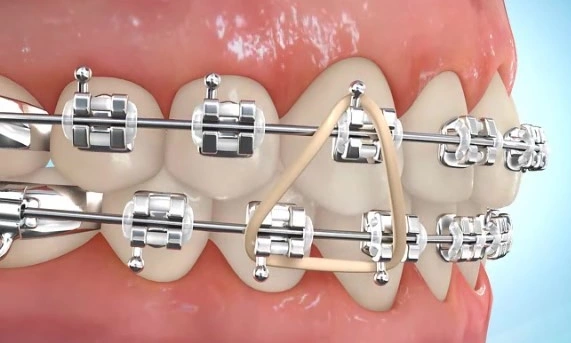
Applying the rubber bands in this pattern helps to pull the top teeth forward and the bottom teeth back.
Watch the video below to see how triangle elastics can help fix an open bite.
Do I Really Need to Wear Rubber Bands On My Braces for My Orthodontic Treatment?
You can think of it this way. If you’ve already put the time and resources into getting orthodontic treatment, how much more of a hassle will it really be to temporarily add on rubber bands? In the long run, anyone with a bite problem is truly grateful that they chose to put rubber bands on their braces.
As you can see from the examples above, orthodontic rubber bands can be worn in different patterns and directions to fix different types of bite problems. It’s important to follow the specific instructions from your orthodontist regarding how to wear the rubber bands on your braces.
Make sure to ask your orthodontist to repeat rubber band directions if you’re not getting the hang of it right away. With time, putting rubber bands on your braces will be second nature.
How Often Do I Need to Wear and Change My Orthodontic Rubber Bands?
For most patients, wearing your rubber bands all day and all night is required. The two main exceptions are when you eat or when you brush your teeth.
Every time you take your rubber bands out, make sure to replace them with a fresh set. If you keep using the same rubber bands for too long, you’ll notice them start to lose their strength or they can break. You can usually expect to wear 4-5 sets of rubber bands each day.
Think it’s okay to skip rubber bands for a day – or even just an afternoon? Then listen to this!
When you put force on a tooth it starts to move a little bit. When you take the force off the tooth it will begin moving back. So, if you wear your rubber bands for just an hour and then leave them off for 3 hours, your teeth probably didn’t make any progress!
In order to get your teeth to move permanently, you must apply constant force over a long time. The longer the better! That is why wearing your rubber bands day and night (even to bed) is very important.
In some instances, we may recommend patients wear their rubber bands only at night time. This usually means that we like the position your teeth are in and want to make sure they stay right there.
In any case, always follow the instructions of your orthodontist regarding how often to wear your orthodontic rubber bands; if you’ve been told to wear them full-time, it’s vitally important that you do so. This is the only way to be certain we get the desired movement that the teeth need.
How to Put Rubber Bands on Braces: Tips to Try
At first, rubber bands may feel awkward to put on your braces, but with practice and these helpful tips, you’ll be a pro!
Watch our video below for tips and tricks on how to put on rubber bands.
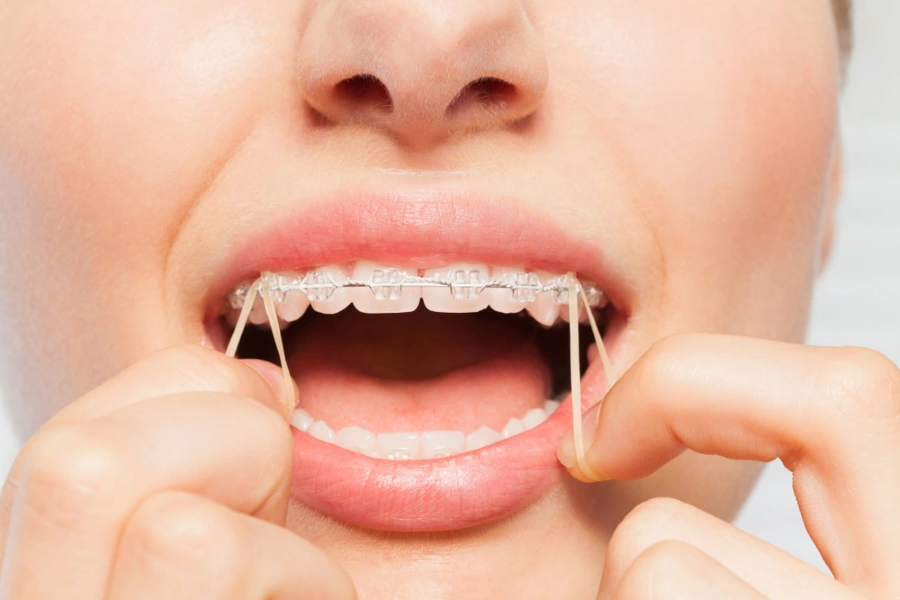
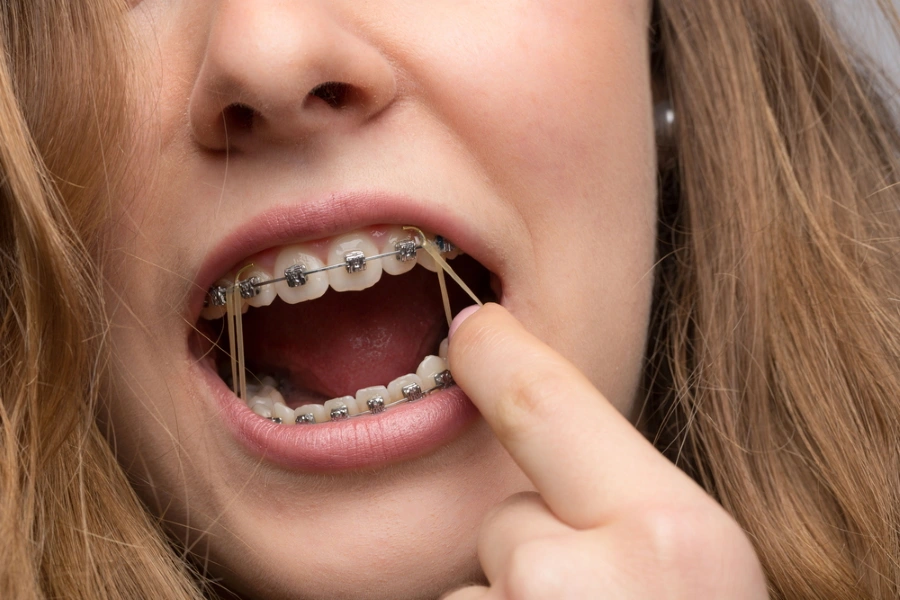
Using your fingers to guide the bands into place tends to be the easiest method. To do this, stand in front of the mirror so you can see your teeth – then hold the rubber band securely between your thumb and pointer finger. Hook the rubber band on the tiny hooks of the braces on the top teeth and pull the rubber band to the hook on the bottom teeth.
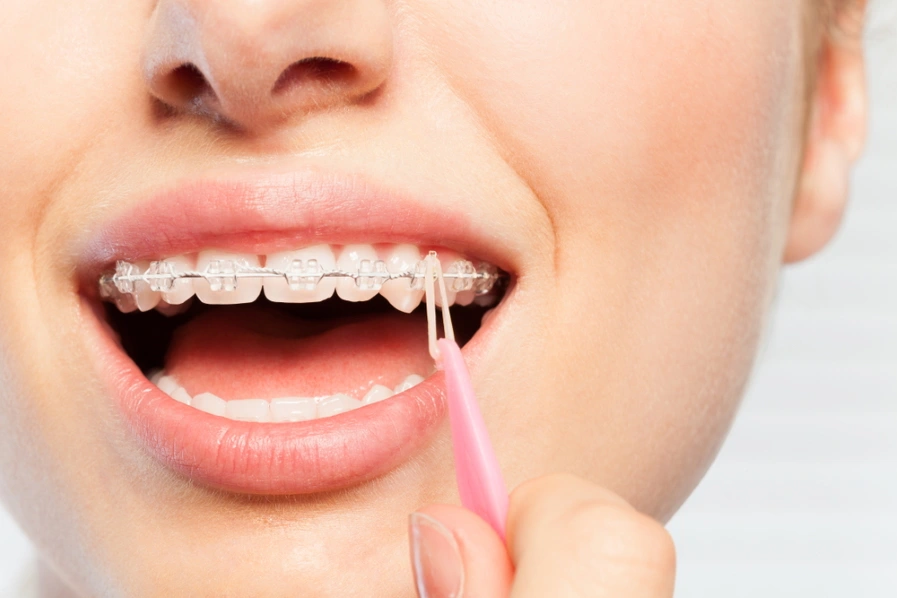
For those with long nails or that have trouble pinching their rubber bands with their fingers, you can also use a plastic hook that can help with placing rubber bands.
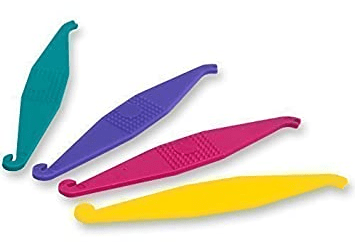
Most of the time your orthodontist has these hooks on hand and will gladly give them to you. If needed though, you can also find them on Amazon here.
With these plastic hooks, you simply place the rubber band on the hook and guide the rubber band around the hook of your bracket. Finally, pull the rubber band, using the plastic hook, onto the hook of the bracket on the opposite arch.
A few more tips for placing rubber bands on braces are:
-
Bite down and keep your teeth together while placing your rubber bands. This will make it easier to get the band stretched.
-
Your rubber bands will come in a bag, but we recommend getting a second bag too just in case you need some extra elastics. Keep one at home and one at school or in your backpack. That way you always have one on hand after lunchtime. It’s always recommended to carry extra elastics when you are going to be out of the home for an extended amount of time.
-
If you run out of rubber bands or need more, call your orthodontist. Don’t try to use traditional office supply rubber bands – even as a temporary replacement. Orthodontists can always arrange to have you stop by and pick up a spare bag.
Remember, whatever, you do, never go too long without wearing your rubber bands!
The more you wear your rubber bands on your traditional braces and follow the instructions of your orthodontist, the faster your bite will get corrected, and the sooner your braces will come off!
It’s one of the biggest ways that you, as the patient, can affect the quality of your treatment outcome and the total amount of time that you’ll spend in traditional braces.
Braces in Phoenix, Chandler, Maricopa, and Casa Grande
Premier Orthodontics has 6 locations providing orthodontic treatment, braces, and Invisalign in Phoenix, Chandler, Gilbert, Maricopa, Casa Grande, and Glendale as well as the surrounding areas.
Schedule your free consultation for braces or read our comprehensive guide to the cost of braces. (We are very transparent about our process and our pricing, as you’ll see in this guide.)