Invisalign Instructions
By Dr. Dustin Coles – Premier Orthodontics
Table of Contents
If you’ve started or are just starting Invisalign treatment, you likely received Invisalign instructions from your orthodontist.
To no fault of anyone, certain details about your treatment can be forgotten or missed in those initial appointments…
…so use this article, which covers all of the information you need for your Invisalign treatment to answer any questions you still may have.
For video instructions for Invisalign, watch below.
Invisalign Instructions for Identifying Your Aligners
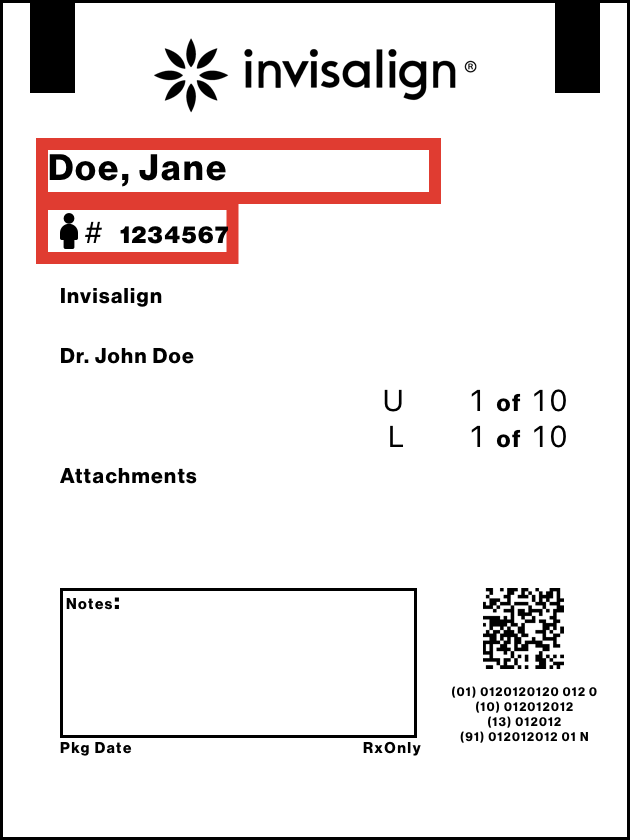
Your Invisalign aligners come in a series of bags. These bags will typically have:
- Your Name
- Your Unique Case #
- Your Aligner Number (ordered sequentially, starting with 1)
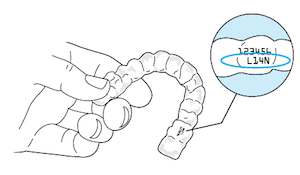
If you look closely at your aligners, you’ll see that each aligner has small letters and numbers printed on them. Each aligner is marked with a “U” or “L” to indicate that it is either an “upper” or “lower” aligner. Each aligner also has a number, which will correspond to the number on the bag.
Instructions for Changing Your Invisalign Aligners
You will begin with aligner #1. After wearing this aligner for the specified number of days, you will switch to aligner #2. (Your orthodontist should have instructed you on the specific number of days you must wait before switching over to the next aligner).
Usually it’s best to change your aligner at night, just before you plan on going to bed. When you’re sleeping, you will experience less discomfort as your teeth have to get used to each new aligner.
It’s a good idea to keep your most recent aligner nearby as an emergency backup, even after you’ve already used it for the specified number of days. That way if you happen to break or lose your current aligner you can use your backup to hold your teeth in place while arranging for a replacement.
Invisalign Instructions for Inserting/Removing Aligners
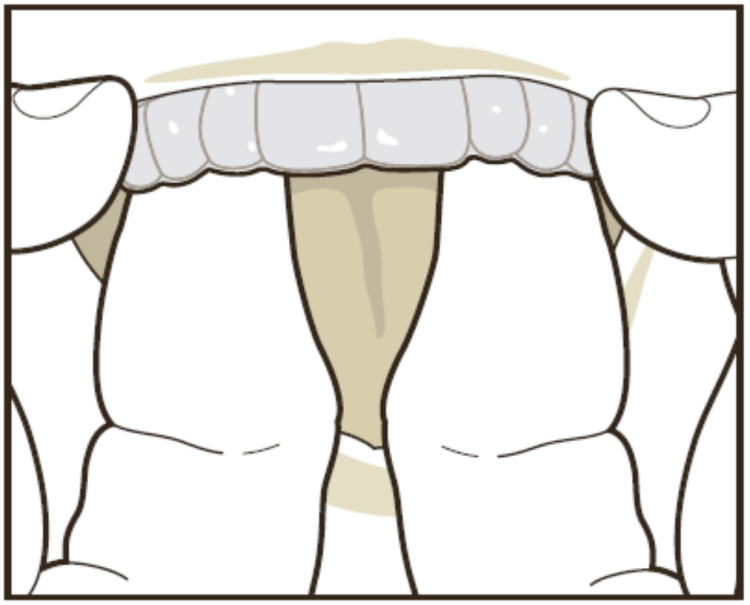
Inserting Invisalign Aligners
When inserting your Invisalign aligners, start by gently pushing the aligner over your front teeth. Then apply pressure, using your fingertips, to the tops of your left and right molars (back teeth) until you feel the aligner snap into place.
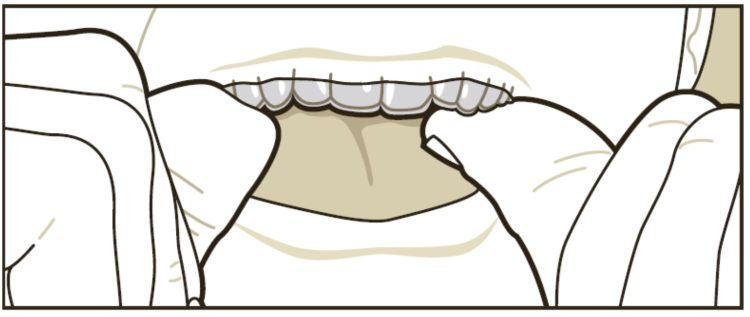
It may be tempting to bite your Invisalign aligner into position, but try to avoid this. Biting down on the aligner can cause damage and lessen its long-term effectiveness.
Removing Clear Aligners
On one side of your mouth (whether you start on the left or right side is up to you), use your fingertip on the inside of your back molar to slowly pull the aligner from your molars.
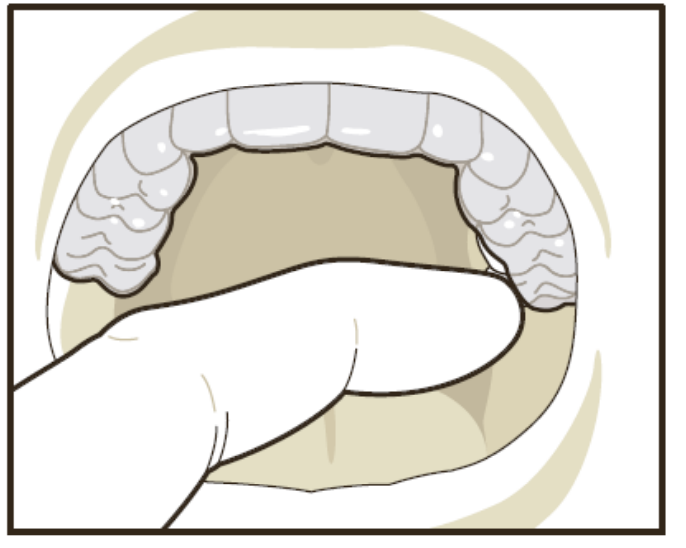
Repeat this process on the other side of your mouth.
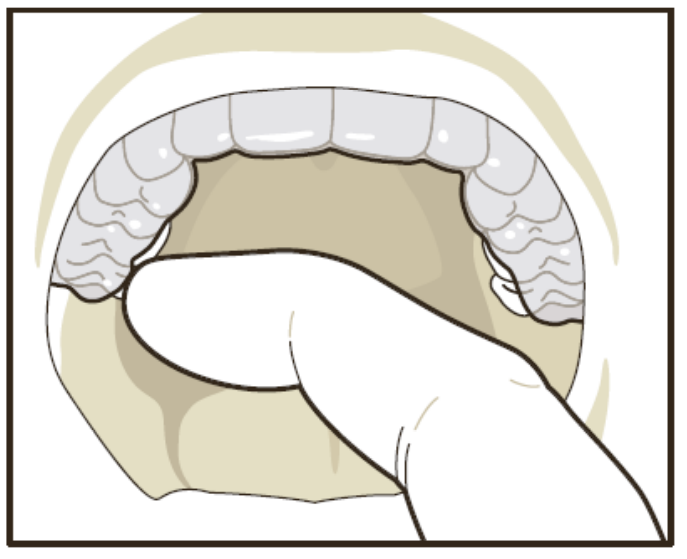
Once the Invisalign aligner is disengaged from the molars on both sides of your mouth, slowly work its way forward by gently prying the aligner away from your teeth with your fingertips.
If you are having trouble with this step, make sure the aligner is fully disengaged.
Once you remove your aligner it’s a good idea to rinse it with water, shake off any excess droplets, and store in your aligner case.
How to Store Your Invisalign Aligners
When your aligner is not in your mouth, it should be in your Invisalign case.
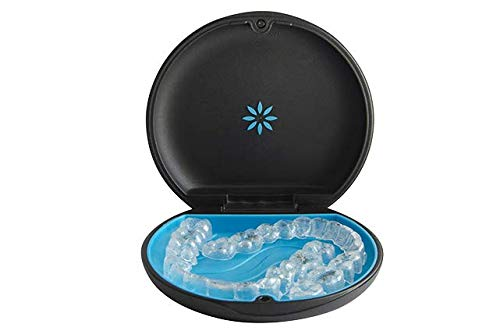
If aligners are left out of the case for any reason, bad things tend to happen to them. Here are just a few potential things that could happen…
- The family dog chews it up.
- It’s wrapped in a napkin and thrown into the garbage by a helpful waiter at a restaurant.
- It falls on the floor and gets stepped on.
- It gets lost or misplaced.
Here’s a saying to help you remember where your aligners should be at all times: “It’s in your face or in your case”. If you can follow these instructions, you shouldn’t have any problem keeping your Invisalign aligners safe.
Good Hygiene Practices While Wearing Aligners
Always brush your teeth before placing your aligners in your mouth. If you don’t first brush all of the food that you recently ate, this food will be trapped inside of your aligner. Over time, this may lead to:
- Bad breath
- Discoloring of your aligners
- Tooth decay
- Gum inflammation
All of these problems are easily avoided if you make sure to always brush before wearing your aligners.
If you don’t have immediate access to a toothbrush at the time of placing your aligner, you should at least rinse your mouth vigorously with water.
It’s also recommended that you clean your aligners before wearing them. Read below for specific instructions for cleaning your Invisalign aligners.
Instructions for Cleaning Invisalign Aligners
Cleaning Invisalign Aligners With a Toothbrush
The easiest way to clean your aligners is by using your toothbrush to scrub them clean.
We recommend placing a small amount of dish soap or hand soap into your aligner first, scrubbing it vigorously with your toothbrush, and then rinsing it thoroughly with water.
It’s as simple as that – the hard part is just remembering to do this consistently).

Ideally you should be brushing your Invisalign aligners multiple times a day.
Every time that you eat you should be brushing your teeth and brushing your aligners before inserting them. Following these particular Invisalign instructions keeps your mouth clean and extends the life of your aligner.
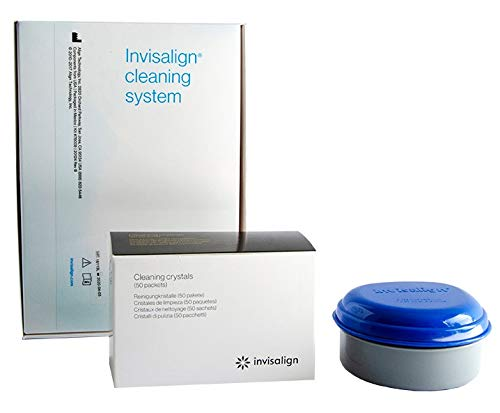
Cleaning Invisalign Aligners With Invisalign Cleaning Crystals
A second option to clean your Invisalign aligners is by soaking them with Invisalign Crystals.
A free sample of Invisalign Cleaning Crystals are usually included with your Invisalign new patient kit. Refills can be purchased as part of the Invisalign Cleaning System.
Follow these steps to clean your aligner using the Invisalign Cleaning Crystals:
- Place your aligner under lukewarm running water and gently rinse it to remove all food debris.
- Fill the Invisalign cleaning tub (or a small clean cup) with enough lukewarm water to submerge the aligner.
- Empty a packet of the Invisalign crystals into the cleaning tub.
- Place the aligner in this cleaning solution. We recommend 15 minutes of letting the aligner soak in this cleaning solution.
- Take out the aligner from the cleaning solution and rinse it again with lukewarm water.
- Take a soft-bristled toothbrush and get the bristles very wet with tap water. Use this toothbrush to then gently scrub the aligner on both the sides so that the leftover particles can be removed.
- Thoroughly rinse the aligner one final time. This guarantees they are fresh, clean, and ready to wear.
Invisalign Cleaning Crystals can be used periodically when you want to give your Invisalign aligners a thorough cleaning.
Brushing your aligners with a toothbrush is the method you should follow multiple times a day, while cleaning crystals can be done once a day or maybe once every couple of days.
How Long Should I Wear My Invisalign Aligners During the Day?
Unless instructed differently by your orthodontist, Invisalign aligners should be worn 20-22 hours per day. This means that you should remove them only during those 2-4 hours you spend eating a meal, snacking, drinking any liquid that isn’t cold water, or brushing your teeth.
It’s okay to drink cold water with your aligners in your mouth—but otherwise they should always be removed when eating or drinking.
What if I Lose or Break My Invisalign Aligner?
If you lose or break an aligner, definitely reach out to your orthodontist.
If you’ve lost just one aligner, you may be able to skip to the next aligner without any problem. If you’ve lost multiple sets of aligners, your orthodontist will likely need to order you some replacement aligners.
Invisalign in Phoenix, Chandler, Maricopa, Anthem, and Casa Grande
Premier Orthodontics has 6 locations providing braces and Invisalign in Phoenix, Chandler, Gilbert, Maricopa, Casa Grande, and Glendale as well as the surrounding areas.
Schedule your free consultation for Invisalign or read our comprehensive guide to the cost of Invisalign. (We are very transparent about our process and our pricing, as you’ll see in this guide.
Thinking about getting started with Invisalign?
Whether you’re thinking about braces for kids, braces for an adult, or even Invisalign, we’ve got you covered!
Click below to learn how you can get started with Invisalign at Premier Orthodontics for as low as $97/month!