How to Floss with a Permanent Retainer
By Dr. Hemali Kothari
Table of Contents
Permanent retainers keep your teeth aligned after braces or Invisalign.
Permanent retainers work great because…
- They can’t be lost
- They can’t get misplaced
- You’ll never ‘forget’ to put them in
Permanent retainers, while convenient in all the ways shown above, do require some extra work to keep them clean. Without good oral hygiene, permanent retainers may build up plaque and tartar which can lead to cavities and gum disease.
Those with permanent retainers need to be committed to keeping them clean and developing good habits…
In this article, we have put together some tips and instructions on how to floss with a permanent retainer.
Click Below to Watch our Video on How to Floss With a Permanent Retainer
Types of Permanent Retainers
There are two basic types of permanent retainers…
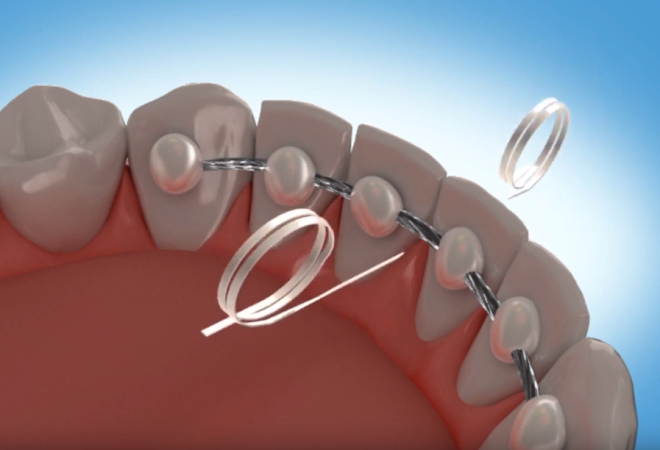
The first type of permanent retainer is a small, flexible wire that is attached to each individual tooth.

Flexible wire retainers are typically placed on the top or bottom teeth.
2. The second type of permanent is stiffer wire. This wire is only attached to the teeth on the end, while stretching across and offering support to all of the teeth in between.
Flexible wire retainers are typically placed on the top or bottom teeth.
2. The second type of permanent is stiffer wire. This wire is only attached to the teeth on the end, while stretching across and offering support to all of the teeth in between.
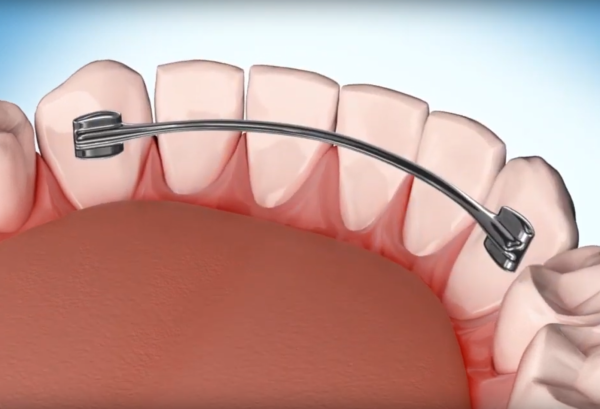
Stiff wire retainers are typically placed only on the bottom teeth.
Depending on which type of retainer you have, the flossing technique will differ.
How to Floss a Permanent Retainer Using Floss Threaders
In order to floss your teeth with a permanent retainer, you will first need to get the floss beneath the retainer wire. The easiest way to do this is by using a floss threader.
(If you had braces, then you may remember using a floss threader)
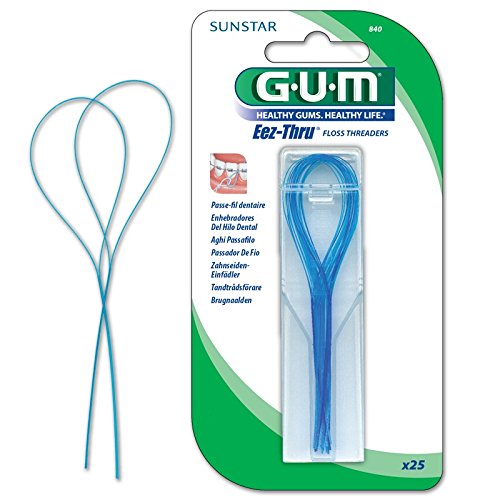
Floss threaders can be purchased online or at any drug store.
To floss your permanent retainer with a floss threader, first pass a piece of floss through the threader…
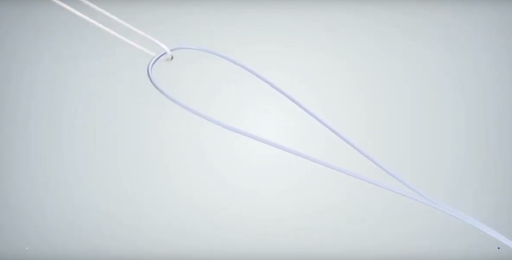
Next, pass the stiff end of the floss threader between your teeth on the front of your teeth and then beneath the retainer wire on the back side of your teeth.
(See the picture below to see this step in action)
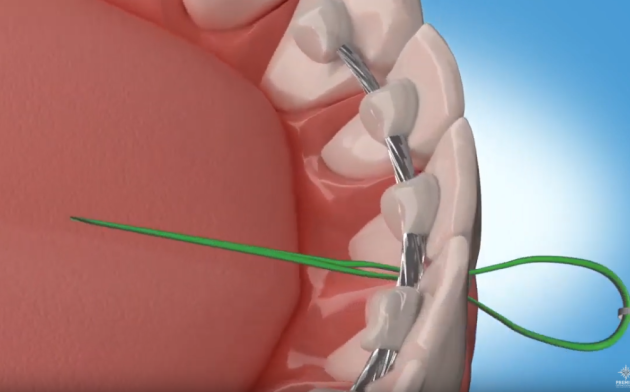
Continue by pulling the threader completely through your teeth until the floss has been passed beneath the retainer wire.
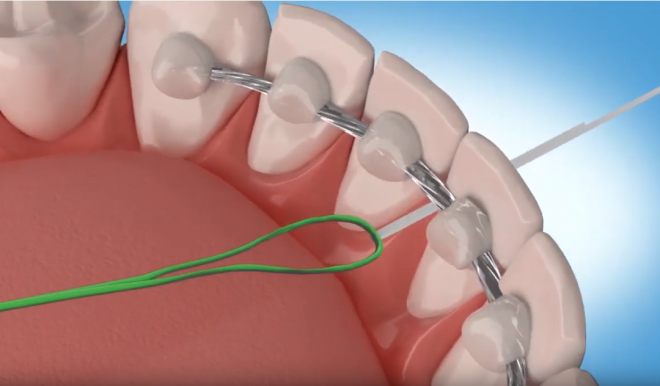
Once the floss is beneath the wire you can floss between those teeth like normal.
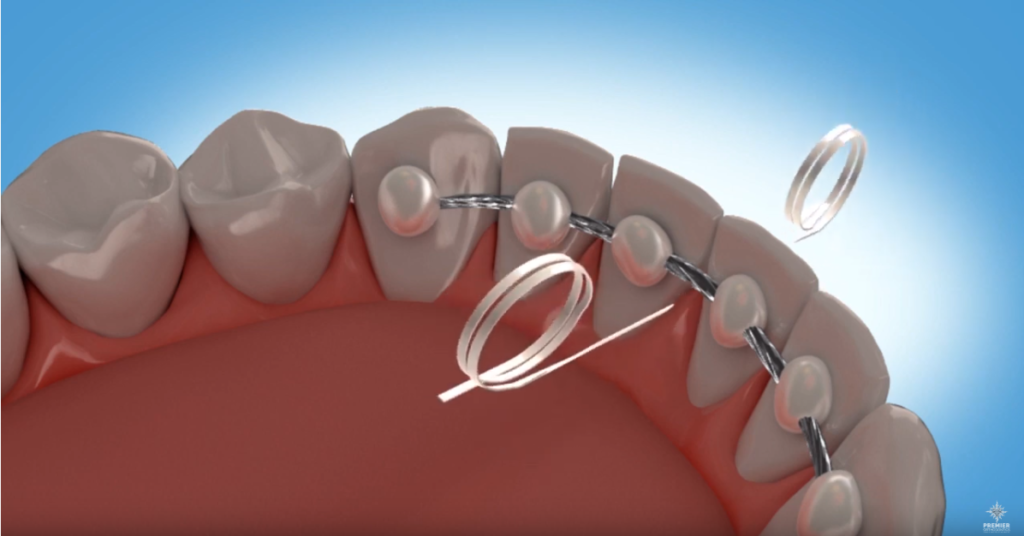
If you have a retainer that is attached to each individual tooth, you will need to repeat this process for each tooth. While time consuming, treating each individual tooth is crucial to the long term health of your teeth attached to a permanent retainer.
To finish, simply pull the floss out, re-thread the threader, and then pass the floss beneath the next tooth.
If you have the stiff wire retainer, or the one that is attached only to the end teeth (similar to the one in the picture below)…

…you will only need to pass through the floss beneath the retainer once.
From there can slide the floss along the wire behind the teeth and floss all 6 teeth without having to rethread the floss.
The great thing about floss threaders is that they are very inexpensive, reusable, and can be found at nearly any drug store. (Your orthodontist may even give you a free pack of them if you ask.)
Most people use floss threaders to floss their permanent retainers because they are effective, inexpensive, and relatively easy to use.
After some practice, it will likely take you only 30-60 seconds per day to floss your permanent retainer with a floss threader.
Like with anything, after using a floss threader for several days straight, you won’t even notice it taking up time in your morning or night routines.
For those who have trouble using floss threaders, see other options below.
How to Floss a Permanent Retainer Using Superfloss
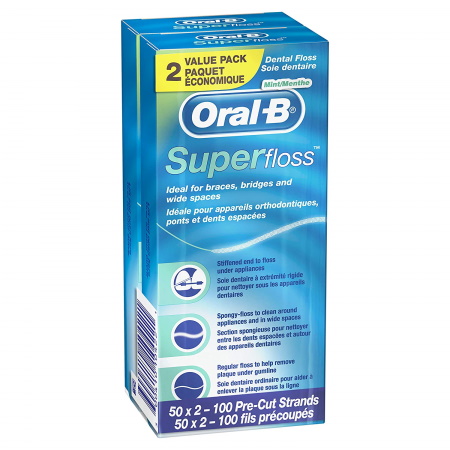
Superfloss is essentially a piece of floss with one stiff end.
Superfloss works similarly to a floss threader, only you don’t need to do the “needle and thread” process. You simply take the stiff end of floss, guide it beneath your retainer, and floss your teeth.
One you get the hang of Superfloss, you can usually floss your retainers in as few as 30 seconds!
Superfloss is quicker and easier than floss threaders. However, it should be noted that they are a one-time use product, meaning you will use a new piece and throw it away each time.
This product isn’t too expensive, and generally comes with 100 per box. So, if you’re flossing daily you will likely need to purchase a new box about every 3 months.
How to Floss a Permanent Retainer Using a Waterpik or Water Flosser
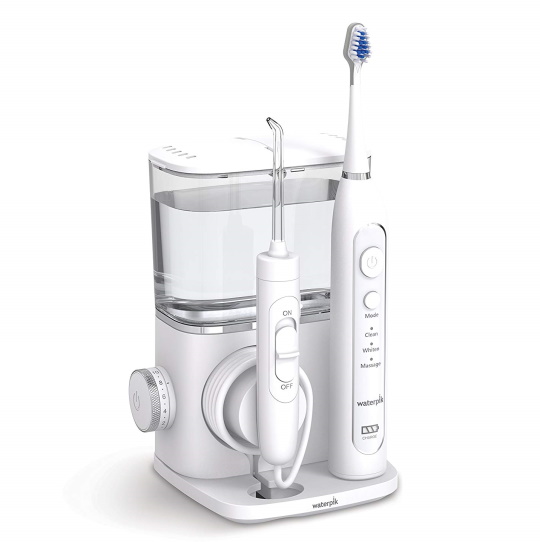
A Waterpik is a popular brand of water flosser. A water flosser is a device that delivers a stream of pressurized pulsating water between your teeth, along the gum line, and around your braces.
If you find that threading string floss beneath your retainer is too difficult or too time consuming, then a water flosser might be a good choice for you!
Waterpiks or water flossers are helpful for younger kids who may struggle with string floss.
You can find Waterpiks or water flossers at your local drug store or online. They are easy and quick – they require just seconds to clean around your permanent retainer.
Keep in mind that Waterpiks will cost significantly more than floss threaders or Superfloss. A Waterpik or water flosser will usually cost between $30 or $70.
Additionally, Waterpiks are not very portable and you will have a harder time packing it with you when you’re away from home.
Since you are going to be living with a permanent retainer for a long time (or as long as you want your teeth straight)…
…it makes sense to find a technique that will work for you and that you can easily make part of your normal routine!
Whether you’re using a floss threader, Superfloss, or a Waterpik to floss your permanent retainer, the most important part is doing it regularly and consistently.
By making flossing beneath your permanent retainer part of your daily routine, you can make sure you’re doing everything you can to keep your teeth clean and healthy for life!
Braces in Phoenix, Chandler, Maricopa, and Casa Grande
Premier Orthodontics has 6 locations providing braces and Invisalign in Phoenix, Chandler, Gilbert, Maricopa, Casa Grande, and Glendale as well as the surrounding areas.
Schedule your free consultation for braces or read our comprehensive guide to the cost of braces . (We are very transparent about our process and our pricing, as you’ll see in this guide.)
Schedule a Free Braces Consultation For You or Your Child
Thinking about getting started with braces?
You can schedule a 100% free consultation and find out if clear braces the best choice for you.
Whether you’re thinking about braces for kids, braces for an adult, or even Invisalign, we’ve got you covered!
Click below to learn how you can get started with braces for as low as $89/month.

